
Multi-Panel Canvas Sets: Smart Layouts, Even Spacing, and Straight Hanging
Share
What You’ll Learn
Multi-panel canvas sets turn a blank wall into a single, unified picture. This guide explains how to read set dimensions accurately, pick layouts that suit the wall and furniture, set equal gaps so the image reads as one, and hang each panel straight with a simple, repeatable method. The process below reflects professional production standards—high-resolution printing on quality canvas, natural wood stretcher bars, careful inspection, and layered packing—so your set arrives ready to hang and keeps its clean look over time.
Understand the Set Before You Drill
Size labeling that avoids surprises
Most multi-panel product pages list the combined width of the full set when all panels are arranged as shown in the preview. The spacing you’ll leave between panels on the wall is typically not included in that number. Before marking a single hole, confirm three things: the combined size, the panel order, and the edge depth. Edge depth affects how the set sits on the wall and the shadow line it casts. If you prefer a defined border that makes alignment easier, explore framed options in Modern Canvas Prints — CetArt.
Materials and build quality
Look for high-resolution printing on professional canvas, tight stretching on natural wood bars, and clean corners. These details keep lines true across every seam. Hardware pre-installed at the workshop saves setup time and helps the full set sit level. Protective packing with multiple layers shields edges in transit. To browse a wide range of subjects that pair well with clean furniture lines, start with the main collection: Canvas Print Collection — CetArt.
Core Layout Types (and When to Use Each)
Triptych (3 panels)
The most common multi-panel format because it fits many wall widths without crowding. Place the middle panel over the furniture midpoint, then mirror the spacing to the left and right. If you want subtle structure without heavy borders, try clean, contemporary subjects in Modern Wall Art — CetArt.
Quadriptych (4 panels)
A four-panel arrangement suits grid layouts and straightforward alignment. Keep the top edges on the same line and maintain the same gap at every seam. This format works well for images with steady rhythm across the composition.
Five-panel panorama (and 5+)
For long walls or wide furniture spans, a five-panel or wider panorama provides a continuous scene with presence. Use slightly narrower gaps so subjects—waves, skylines, mountain ridges—read as one picture. When you need a larger statement for a spacious wall, explore Large Wall Art — CetArt.
Spacing Rules That Make the Image Read as One
Set equal gaps first
Decide your gap before you pick up the drill. Cut cardboard spacers to that width and use them for every seam. Consistent gaps are the quickest way to help multiple panels look like a single picture. Mark the combined width and the edges of each panel with painter’s tape so you can preview the result at full scale. Abstract compositions can handle a slightly wider gap; strong line work and architecture usually look cleaner with tighter spacing. For modern shapes and line-driven subjects, see Abstract Modern Art — CetArt.
Eye level and furniture alignment
Keep the visual center of the set at a comfortable eye height. When hanging above a sofa, console, or headboard, leave a modest, consistent gap above the furniture so the composition feels grounded. If a horizon crosses a seam, test spacing with tape to avoid a small step between panels.
Measure with Confidence
The 60–75% rule
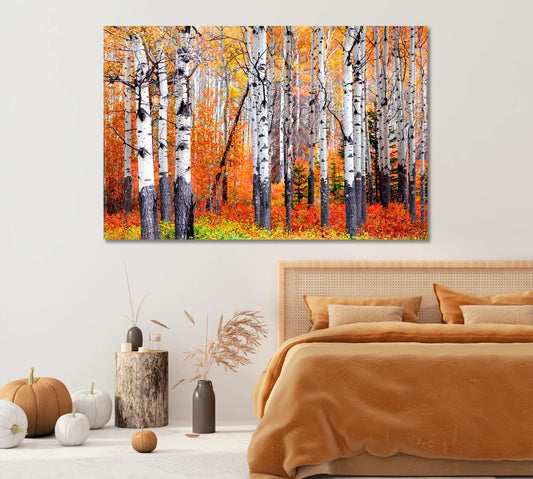
A reliable guideline is choosing a combined set width that’s roughly 60–75% of the furniture width below it. This proportion fills the wall without crowding corners or door frames. After marking the outline with tape, step back to the usual viewing distance. Check the look from seating areas and doorways and adjust before drilling. Nature subjects often suit this scale especially well; for calm, detailed scenes browse Landscapes & Nature — CetArt.
Room-by-Room Placement Ideas
Living room and bedroom
In a living room, one multi-panel set centered above the main sofa creates a clear focal area. Choose subjects with steady structure so the eye settles quickly. In a bedroom, select gentler imagery and target a combined width close to two-thirds of the bed. If you prefer a striking center piece for social areas, explore subjects with strong presence in Wildlife Animals Wall Art — CetArt.
Dining, kitchen, hallway, entry, and work spaces
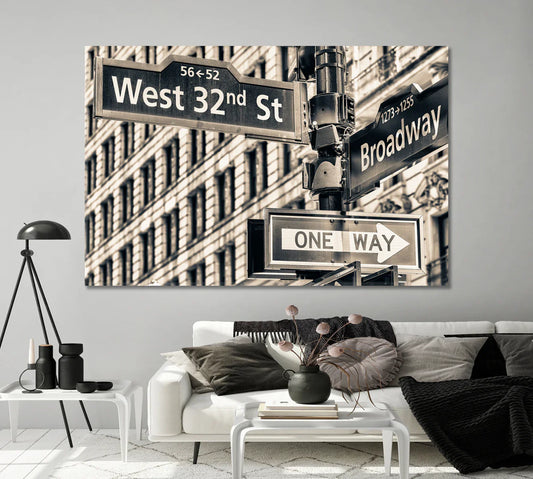
Along open runs, slim panoramas avoid visual clutter while still forming a continuous line. In hallways and entries, a narrow sequence guides movement; keep the midline straight and the gaps identical. For work areas and backgrounds visible on video, choose simple shapes and clean contrast. Helpful options live in Office Wall Art — CetArt.
Hanging Sequence (Step-by-Step)
- Mark the wall center and the full combined width with painter’s tape; add vertical strips to show each panel edge.
- Cut spacing templates from cardboard to your chosen gap width; use them at every seam.
- Dry-fit the panels on a clean floor in the correct order; confirm lines and details flow across seams.
- Hang the middle panel first at the planned height; confirm it is level before continuing.
- Using your spacers, hang adjacent panels and continue outward; re-check level after each panel and adjust before tightening all anchors.
Care and Longevity
Simple upkeep that preserves detail
Canvas needs only basic care. Dust gently with a soft, dry cloth. Avoid household sprays and harsh light. If you refresh furniture or move the set to a wider wall, re-check proportion and consider scaling up. For additional presence and clean detail at size, review Extra Large Wall Art — CetArt.
Design Choices That Lead to a Clear Result
Subject families that stay readable
Abstract geometry, gentle landscapes, botanical studies, skylines, and black-and-white architecture provide a strong focal point without overwhelming nearby furniture or textiles. When mixing different artworks in one room, keep a shared feature—tone, subject family, or line direction—so the wall remains consistent. For crisp monochrome options that work with many interiors, try Black and White Wall Art — CetArt, or browse clean structural lines in Cityscapes & City Views — CetArt.
How Quality Production Shows on Your Wall
From file to frame
A strong result begins with image files prepared for print, then produced at high resolution on professional canvas. After printing, the canvas is cured and stretched over natural wood bars with even tension so each edge sits straight. Corners are folded cleanly so the piece looks neat at viewing distance. Hardware is installed in the workshop to ensure alignment and hold strength. Before shipping, each panel is inspected, protected with multiple layers, and clearly labeled so you can unbox and hang without guesswork.
Two Handy Lists to Keep Nearby
Quick checklist (print-friendly)
- Confirm combined size for the full set; plan the gap and cut spacers to match.
- Match width to roughly 60–75% of the furniture below the set.
- Choose layout: triptych for many walls, quadriptych for simple grids, five-panel for long spans.
- Decide framed vs. gallery-wrapped depending on the look you want.
- Mark the wall center; hang the middle panel first; check level each time.
- Use identical gaps at every seam so the image reads as one composition.
Subject guide (fast pick list)
- Modern shapes and clean lines: Abstract Modern Art — CetArt
- Quiet scenery with natural rhythm: Landscapes & Nature — CetArt
- Strong focal points and character: Wildlife Animals Wall Art — CetArt
- Urban structure and perspective: Cityscapes & City Views — CetArt
- Monochrome contrast and simple palettes: Black and White Wall Art — CetArt
Explore More Formats
Next steps
If you want a single-panel hero to pair with your multi-panel set, or you’re refining subjects for a focused workspace, the pages below can help. Keep links relevant to the plan for your wall and use no more than ten total on this page for clarity: Wall Art — CetArt and Office Wall Art — CetArt. For a broad view of everything new, you can browse New Arrivals — CetArt when planning future updates.
Final Word
A simple plan for a strong result
Measure the wall, choose a layout that fits the span, keep gaps equal, and hang from the center out. Combine these steps with clean subject choices and sound production—professional canvas, natural wood stretchers, and careful packing—and your multi-panel set will read as one picture and remain reliable for years. When you’re ready to choose, begin with a focused collection, confirm combined size, and use a spacer-first hanging method. The result is a clear, confident display that suits the room and stays easy to live with.